GameBoy Thumbnails on Linux using sameboy
Where I started
My introduction to SameBoy came from stacksmashing’s “How to reverse engineer & patch a Game Boy ROM” video.
I’m not big on reverse engineering but I do enjoy a good GameBoy game when I see one.
and there it was

this is the type of integration I like to see from projects
but these kinds of features are almost never present on Linux be it because no one bothers or because each major DE supports a different method.
Despite that I was interested in it and started looking through the code
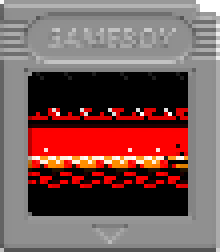
pretty images for pretty games
the code was simple it stored the framebuffer output in a bitmap image and composed that under the image for the cartridge case.
Seems simple
 1            bitmap* pbitmap  = malloc(sizeof(bitmap));
 2            pbitmap->fileheader.signature[0] = 0x42;
 3            pbitmap->fileheader.signature[1] = 0x4D;
 4
 5            pbitmap->fileheader.filesize = sizeof(pixels) + sizeof(bitmap);
 6            pbitmap->fileheader.fileoffset_to_pixelarray = sizeof(bitmap);
 7            pbitmap->bitmapinfoheader.dibheadersize = sizeof(bitmapinfoheader);
 8            pbitmap->bitmapinfoheader.width = 160;
 9            pbitmap->bitmapinfoheader.height = -144;
10            pbitmap->bitmapinfoheader.planes = 1;
11            pbitmap->bitmapinfoheader.bitsperpixel = 32;
12            pbitmap->bitmapinfoheader.compression = 0;
13            pbitmap->bitmapinfoheader.imagesize = sizeof(pixels);
14            pbitmap->bitmapinfoheader.ypixelpermeter = 0;
15            pbitmap->bitmapinfoheader.xpixelpermeter = 0;
16            pbitmap->bitmapinfoheader.numcolorspallette = 0;
17            fwrite(pbitmap, 1, sizeof(bitmap),fp);
18            fwrite(pixels, 1, sizeof(pixels),fp);
19            fclose(fp);
20            free(pbitmap);
I actually wanted to see the images in my filemanager though so I went to see how that is done and quickly changed my mind.
The way you creat ThumbCreator plugins for KDE was way too complicated to propose to the repository so I went Freedesktop Thumbnailer standard instead
the biggest requirement was that the output format was a PNG so I started from scratch
writing my own png lib was too big of an undertaking so I simply chose to use lodepng, a free png library under zlib so it was fair to use
a simple conversion to PNG was completed and the resulting binary outputted pngs for any files you wanted

I was happy with this but it was a bit bare and having to specify the bootrom path wasn’t very user friendly so I took suggestions from max-m and embedded everything needed in the binary itself
but the image does need to be resized if a differnt resolution was desired
so I implemented a basic scaling function with things like passable sample size
 1static void scale_image(const uint32_t* input, const signed input_width, const signed input_height,
 2                        uint32_t* output, const double multiplier, const signed samples)
 3{
 4    signed output_width = input_width * multiplier;
 5    uint32_t pixel;
 6
 7    for (signed h = 0; h < input_height * multiplier; ++h) {
 8        for (signed w = 0; w < input_width * multiplier; ++w) {
 9            pixel = 0;
10
11            signed h_input = h/multiplier;
12            signed w_input = w/multiplier;
13
14            signed h_input_max = (h+1)/multiplier-1;
15            signed w_input_max = (w+1)/multiplier-1;
16
17            signed h_step = h_input_max - h_input + 2;
18            signed w_step = w_input_max - w_input + 2;
19
20            for (signed xa = w_input; xa < w_input_max + 2 && xa < input_width; xa += w_step / samples)
21                for (signed ya = h_input; ya < h_input_max + 2 && ya < input_width; ya += h_step / samples)
22                    pixel = average(pixel, input[(signed)xa + ((signed)ya * input_width)]);
23
24            output[w + (h * output_width)] = pixel;
25        }
26    }
27}
with this I could also create thumbnails of any size that still looked correct
the end result looks great and similar to the MacOS implementation which means I have achived my goal
